Nextcloud Polls
Nextcloud Polls
With Nextcloud Polls, you can create polls directly in Nextcloud and share them with others. This makes it easier, for example, to find dates for the next meeting with your colleagues or friends. In this article, you‘ll learn how to install, configure, and use Nextcloud Polls.

Polls
In many situations, it‘s worth creating a Nextcloud poll to coordinate dates or activities between multiple people. It’s more organized and easier than discussing the date or the next destination in a group chat.

Installation
To install Nextcloud Polls, log in to your Nextcloud with an administrator account, click on the round icon in the upper right corner, and then on “Apps“.
Here you can simply enter “Polls“ in the search and then click on “Download and enable“. A new icon with a poll symbol now appears in the top menu bar.

Setup
Clicking on “Add new poll“ starts a new poll. You can choose between a date poll and a text poll. Here‘s a brief explanation:
- Date poll:
When should something take place? You can add one or more dates. There is also the option to allow participants to suggest additional dates. - Text poll:
What should be done? Here, you can vote on what to do in a group. Multiple suggestions can be provided, but suggestions from participants can also be allowed.
Since the setup is the same for both types of polls, we‘ll explain it using the text poll as an example.
After creating the poll, this window appears:
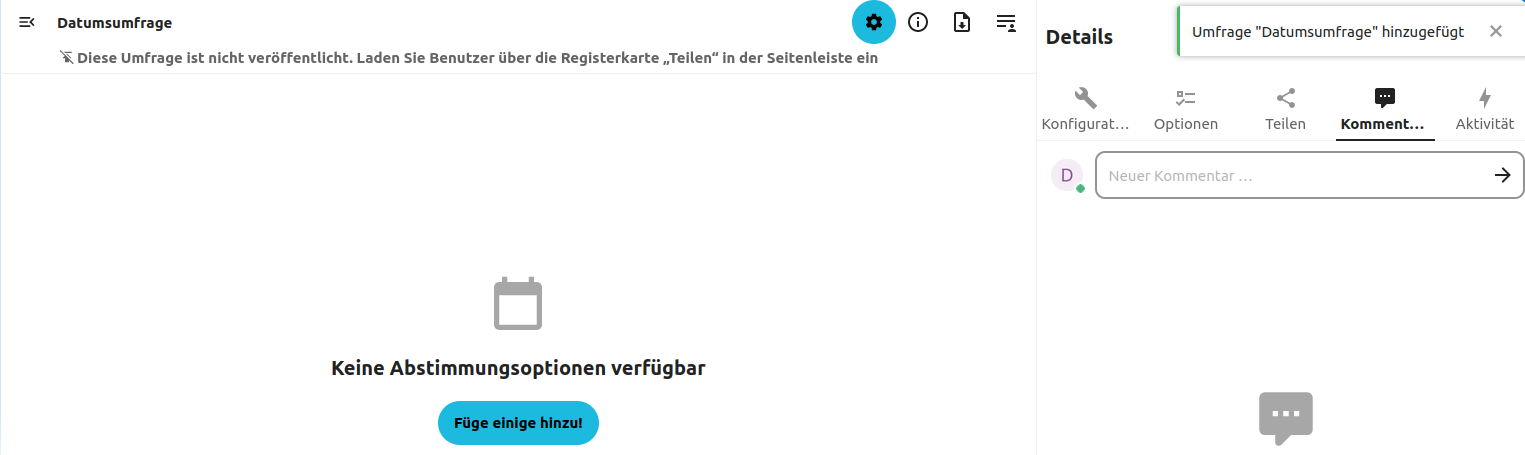
Click on the “Add date“ button to enter at least one date. When you click on “Add date“, a small calendar opens. Here you have the option to enter one or more dates.
You can switch between the tile view and the list view to get a better overview.
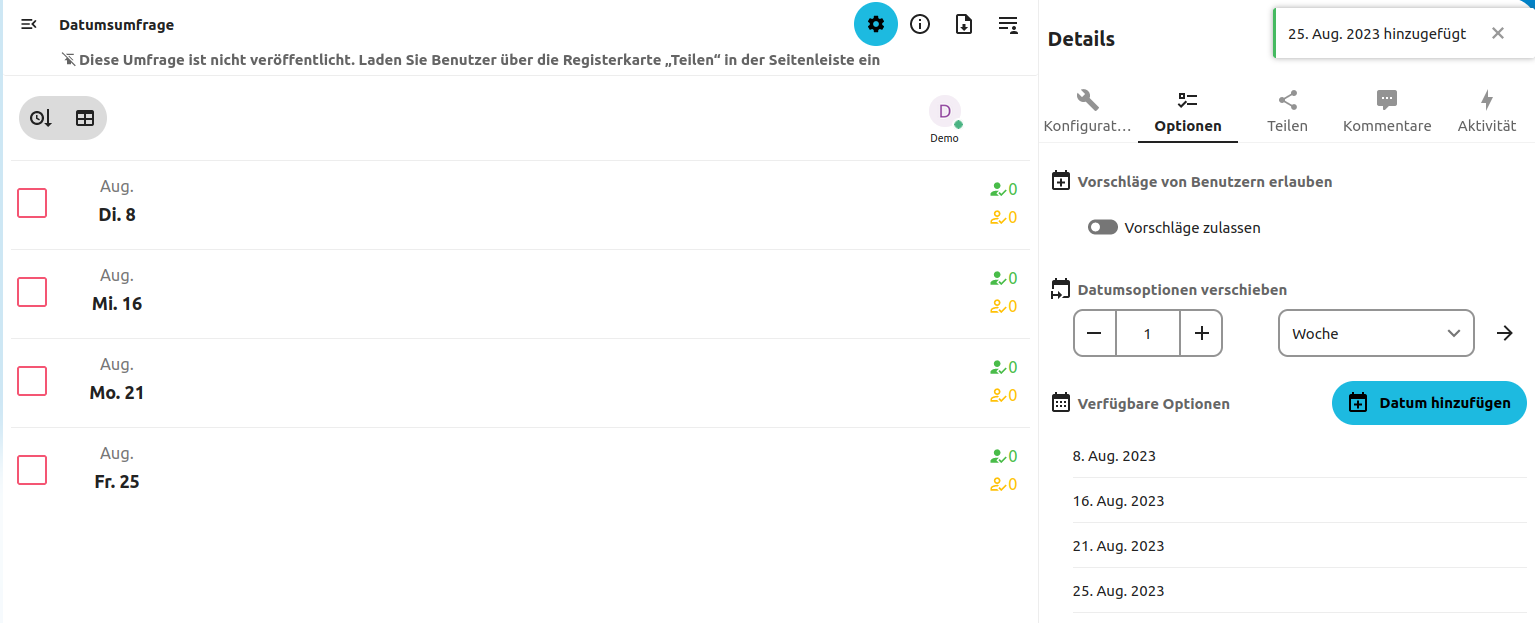
On the right side, the tab has automatically moved to “Options“. Here you can allow participants to make suggestions, as described above. Additionally, you can define how far the dates can be moved.
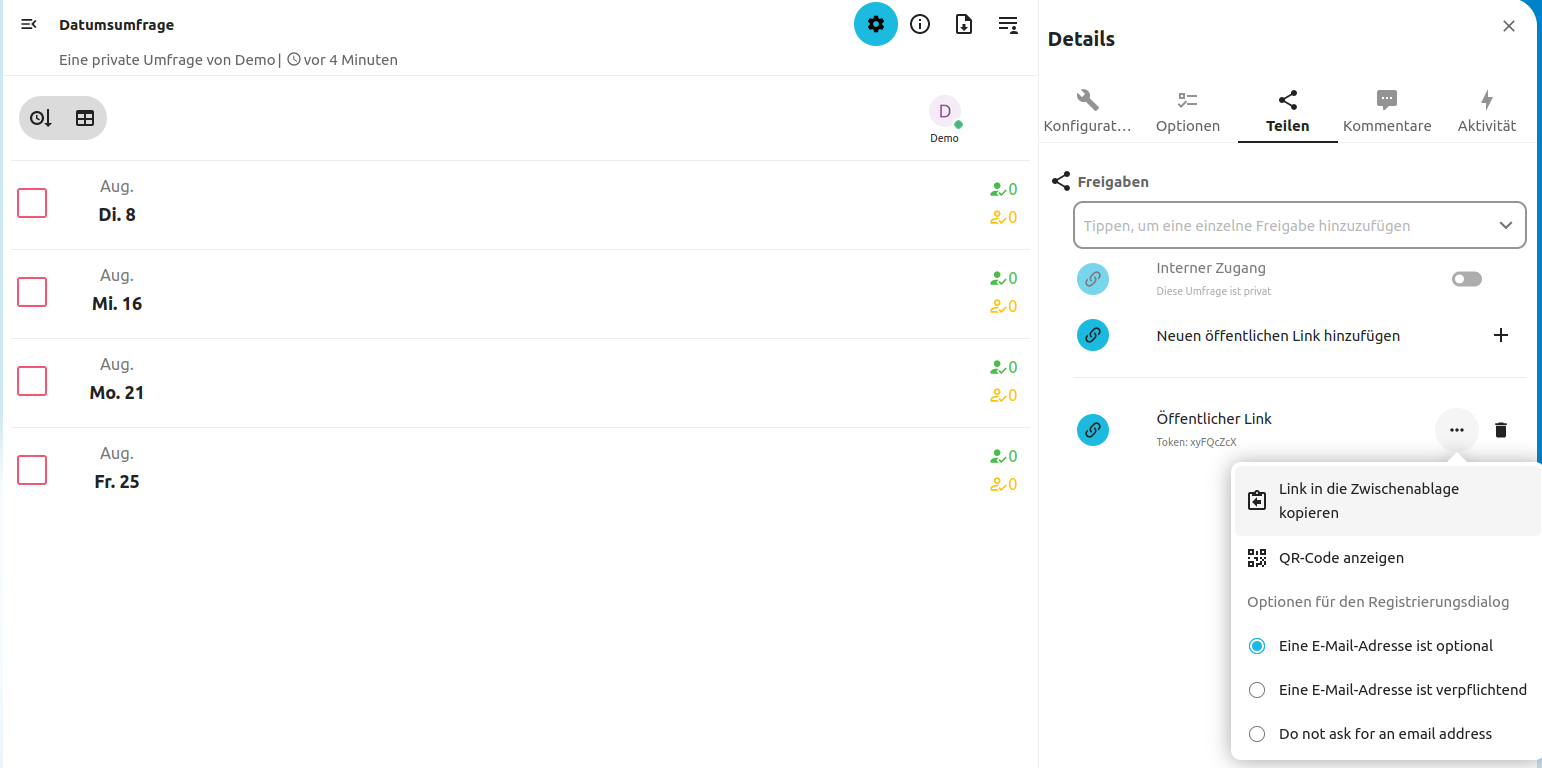
One tab further, you can finally share your poll. Either only with users who are in your Nextcloud or via a public link so that anyone can access it.
When sharing via a public link, you can also generate a QR code and specify whether an email address is required for registration.
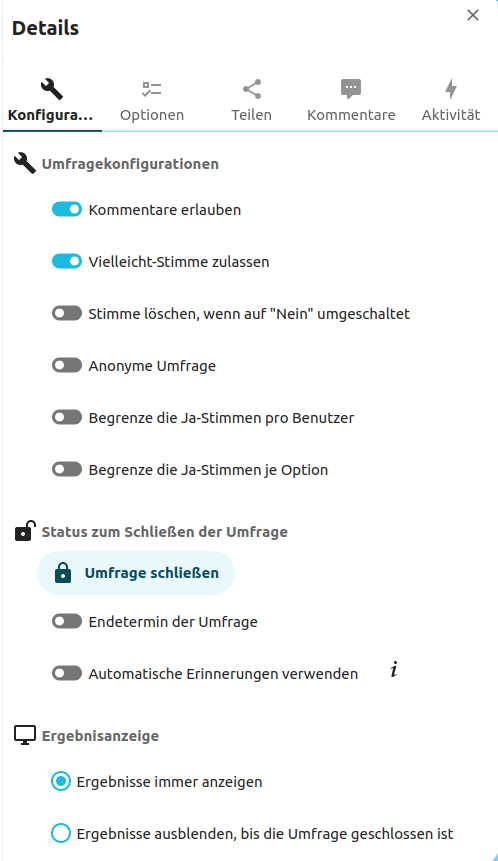
Under the “Configuration“ tab, there are more setting options, such as allowing comments, maybe votes, anonymous polls, etc.
Here the poll can also be closed or time-limited.
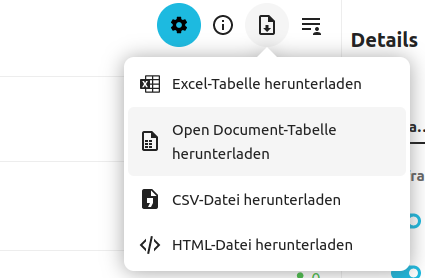
You can always see the results directly in the overview. But you also have the option to download the results of your poll. Simply click on the “Download button“ in the upper right corner.
Overview
Let‘s take a step back and look at the structure of the app. On the left side, under “My Polls“, you’ll find the date poll you just created. The other categories are also self-explanatory.
Further down you‘ll find the Archive, where all completed or deleted polls end up. There’s also the option to combine multiple date polls. At the very bottom, you can make general settings for the polls. For example, you can specify whether conflicts with your calendar should be displayed directly.
The selected poll is displayed in the middle of the screen, and all setting options for this poll are on the right side.
Open Source Software at PathConnect
Simply select and get started. We customize the software exactly to your needs, take care of maintenance, and provide you with personal support. Our offer includes a variety of open source solutions that can be perfectly tailored to your requirements. Enjoy the comfort of an all-around service that includes installation, customizations, and updates, so you can focus entirely on your projects.
Related Articles

Nextcloud Kalender – Die wichtigsten Funktionen im Überblick
Der Nextcloud-Kalender ermöglicht dir eine einfache und datenschutzfreundliche Organisation von Terminen, Meetings und Ressourcen. Im Folgenden stellen wir dir die zentralen Funktionen vor, die deine tägliche Zusammenarbeit erleichtern.

Nextcloud Whiteboard - Creative Work in the Cloud
Whether brainstorming in a team, sketching new ideas, or creating an overview - with Nextcloud Whiteboard you can work creatively in the cloud. This article introduces the app and shows its most important features.

Paperless-ngx: OAuth2 für Microsoft 365 einrichten
Paperless-ngx kann Anhänge aus E-Mail-Postfächern automatisch verarbeiten. Damit dies auch mit einem Microsoft 365 Konto funktioniert, müssen einige Einstellungen vorgenommen werden. In diesem Artikel zeigen wir, was zu tun ist, damit die Anbindung funktioniert.